This article was originally published on Digital Image Magazine in December 2008 and is preserved here for historical reference. While the tools or trends may have evolved, the perspective they reflect remains part of my journey in the photographic world.
In a recent article, we took a look at the huge online community deviantArt. One of the most useful facets of deviantArt for digital artists is the vast amount of stock photography contributed by the some very generous members. Stock can be found by browsing the “Resources” category. Be sure to read the terms of use, as each photographer has his or her own rules, and it’s important that you abide by them. Usually, the main requirement is that, when posting a work of art (”deviation”) created with the stock of other members (”deviants”), you give them credit in your comments. This allows others to view the links back to the original images used, which is a great way to learn. The sharing and generosity on deviantArt is truly remarkable.
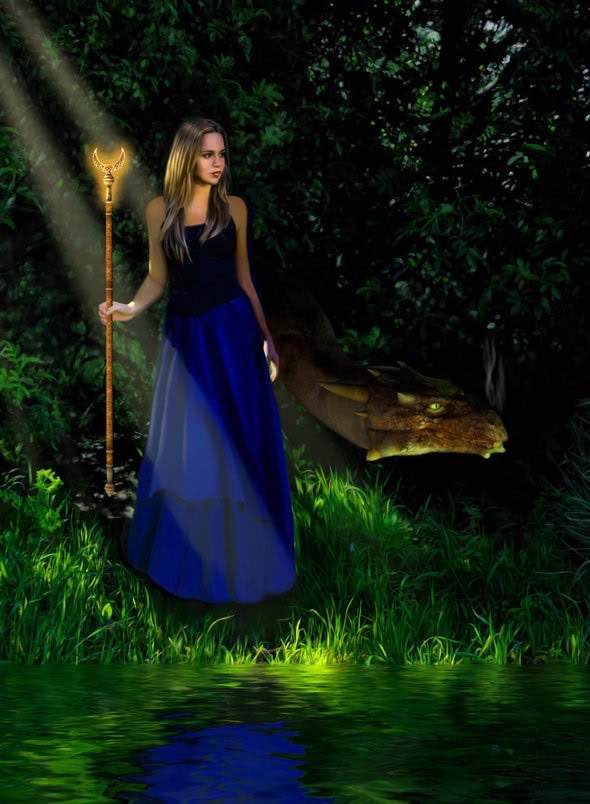
Today we’re going to look at a fantasy painting (top) I created using stock images from deviantArt. First, I found this image from a deviant whose user name is Faestock:
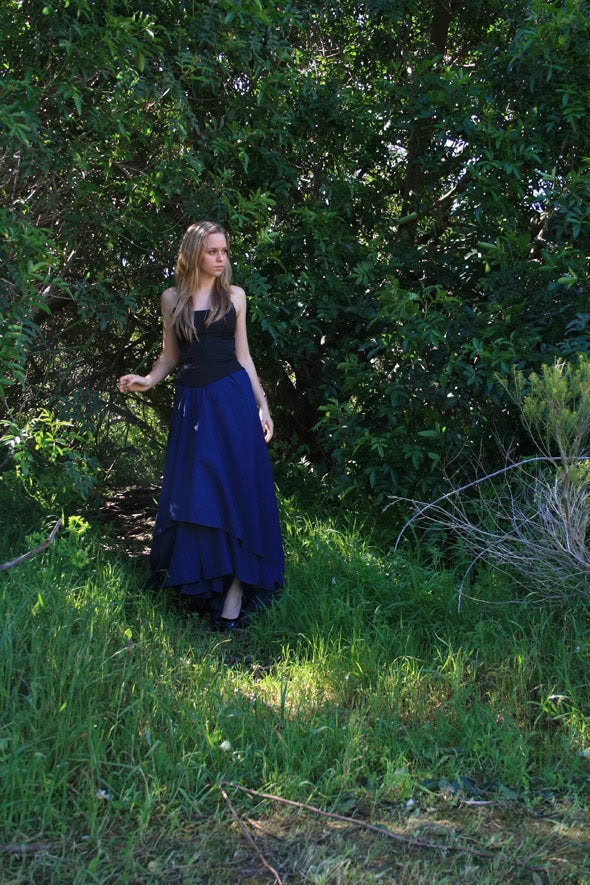
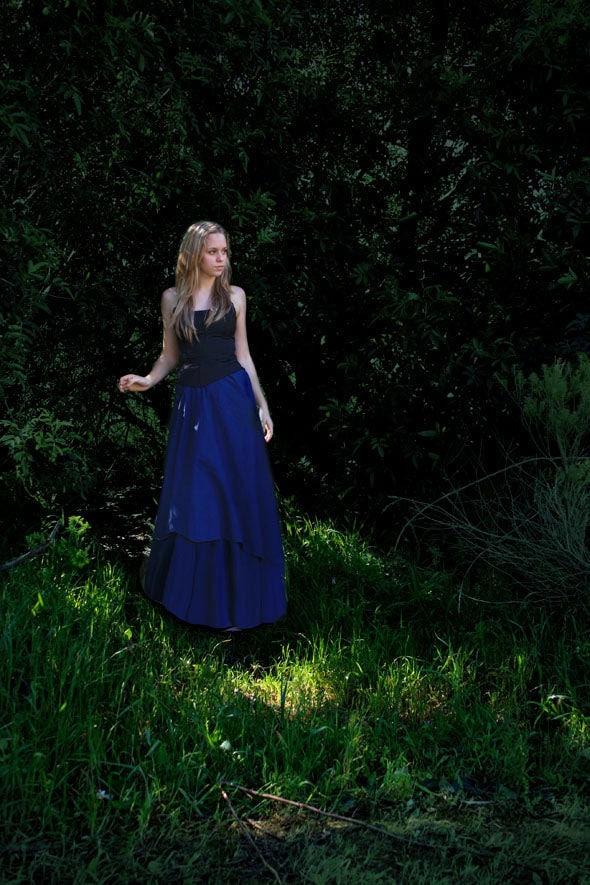
In this photo, the model is standing on a slight hill, which gave me the idea to have her standing on a riverbank, or the edge of a pond. I decided to give her a floor-length dress, which was taken care of with the Liquify filter in Photoshop. Then the background was darkened by adding a layer with dark green. I then added a layer mask, painting over the model on the layer mask to prevent her from turning green. Here’s the work in progress at this point:
The model is posed as though she is holding a staff or a sword. I decided to find her a magic staff, which is easily done on deviantArt! Go to Catergories > Resources > Stock Images > Objects. Type “staff” in the Search box, and bingo, you’ll find some wonderful staffs. The image I found is actually a group of several staffs, all conveniently gathered on a single PNG file with a transparent background. This means no masking is needed — just draw a marquee around the staff you like, copy and paste. My staff was created by deviant Unholy-Stock. After pasting, I moved it over so that it was in the proper place in her hand, and then erased a small area of the staff, to reveal her thumb. Now she looks like she’s holding the staff. To make the staff glow, select the layer the staff is on, draw a marquee around the staff top, and double click the layer to go into layer blending modes. Use the outer glow, with a wide spread and a golden yellow color. Instant magic staff! To create the beams of light, use the polygonal lasso tool and draw a long triangle. Hold down the shift key to add more triangles. Use a feather of about 30 pixels. Then, use the gradient tool to add sunbeams to all triangles at once (they’re all still selected). The gradient color is yellow-white fading to transparent. Beams vanish as they reach the ground. Here’s what it looks like at this point:
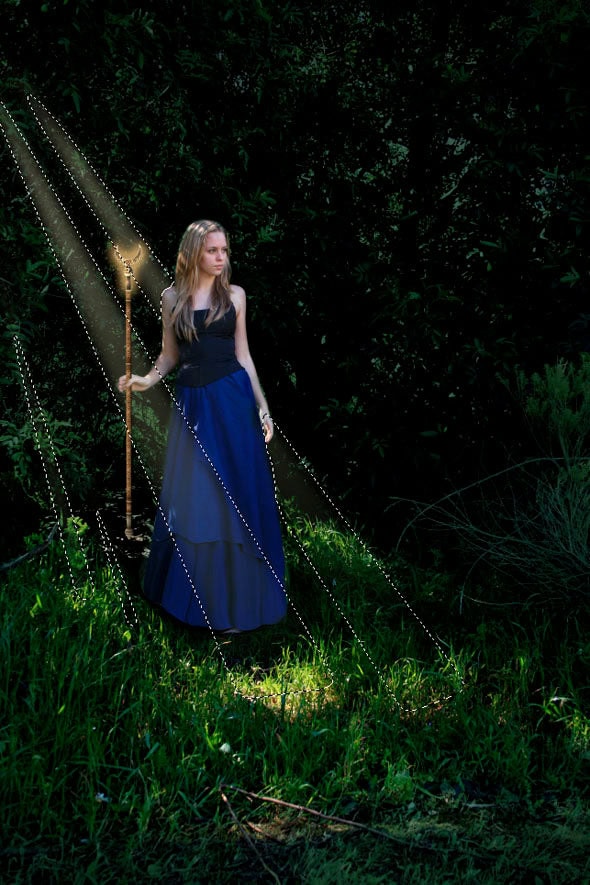
Notice that I deselected the model from one beam, so that it appears to go behind her.
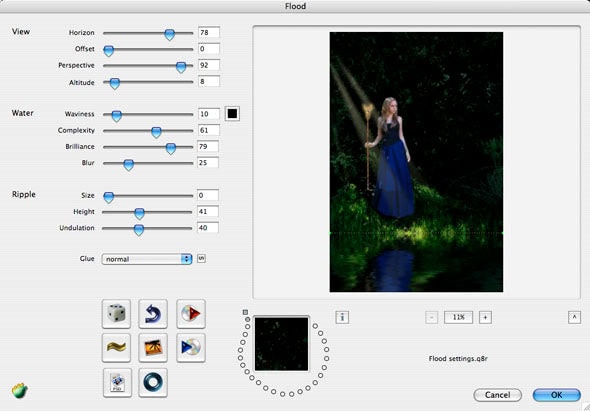
Adding water with the Flood plugin
This article started out as a simple tutorial about using the Flood plugin, and I sort of got carried away! So here’s the Flood part. This is a great plugin available from Flaming Pear, and you can download the demo to try it out. By sliding the Horizon slider back and forth, you can determine how high the water level is. Other settings determine how choppy the water is, how complex the waves are, and so forth. The preview window updates in real time. When you’re satisfied, hit OK and the results appear back in Photoshop.
Adding the dragon
At this point, I thought the image was lacking something. Maybe a dragon would be cool. But dragons are so big! Then it dawned on me: cut off his head! Maybe all I needed was to have him peeking out of the trees. I found this guy on deviantArt, thanks to JLStock:

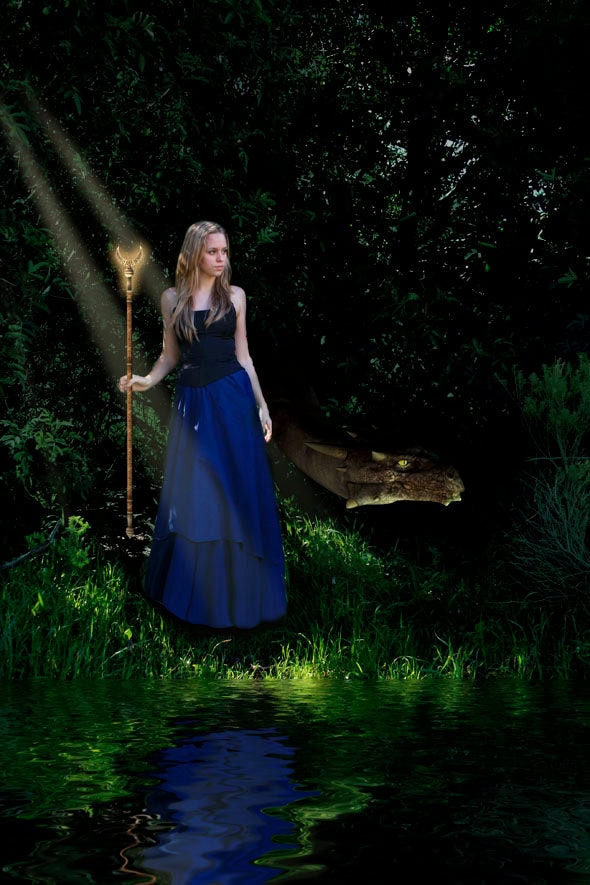
When you’re looking for stock images, don’t forget that sometimes all an image needs is a little crop, or maybe just flip it horizontally. In this case, though, the dragon was facing the right way. I pasted his severed head in, and adjusted the layer he was on (Levels, hue/sat, color balance) until he seemed to belong there. One final trick: I changed the lighting to look like it was reflecting off the sunlit grass, by using Filter > Render > Lighting Effects. I also adjusted the light on the model quite a bit, darkening her left shoulder to match her altered setting. Also, I increased saturation a lot, to bring out the blue in the dress, and the green of the grass. The upper right corner seemed to need a little life, so I brought in a touch of the original photo, for some interest there. Now the image was ready to be brought into Painter for (what else?) painting. Here’s the image at this point:
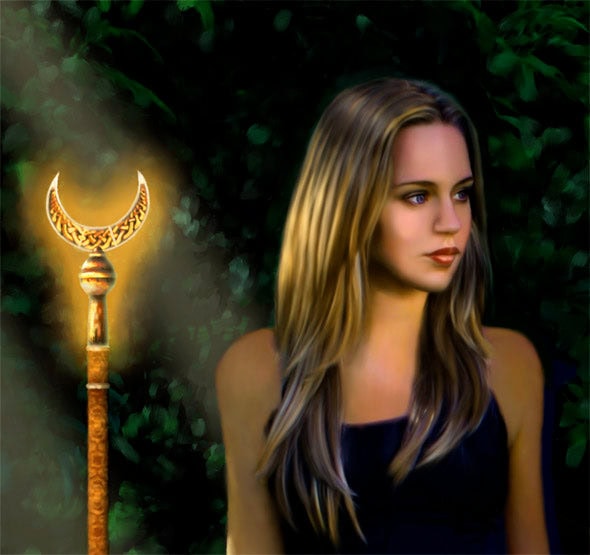
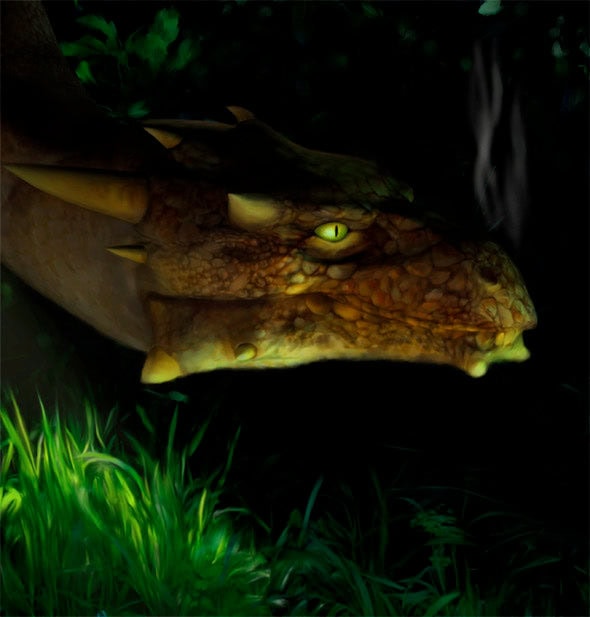
Here are some close-ups to show you the completed painting.
Thanks to the wonderful, generous artists and photographers at deviantArt for creating these great stock images and allowing them to be freely used. I welcome your comments on this tutorial. Let me know if you found it helpful, or if not, what I can do to make it better.
For more in-depth Photoshop tutorials and tips, check out our comprehensive Photoshop guide. For other photography tips and tricks, visit our Photo Mastery blog.
