This article was originally published on Digital Image Magazine in May 2010 and is preserved here for historical reference. While the tools or trends may have evolved, the perspective it reflects remains part of my journey in the photographic world.
Corel Painter and Adobe Photoshop both have tools that apply the appearance of texture to your image, creating a 2D effect that looks like it’s on canvas or rough charcoal paper. Most of the time, I prefer to print the final image on canvas, so I don’t use these texture tools often.
Recently, I worked on a portrait that needed a textured feel in certain areas, and the mood and lighting weren’t quite right. Corel Painter’s Apply Surface Texture tool allowed me to add texture and adjust lighting. Let’s explore how it works.
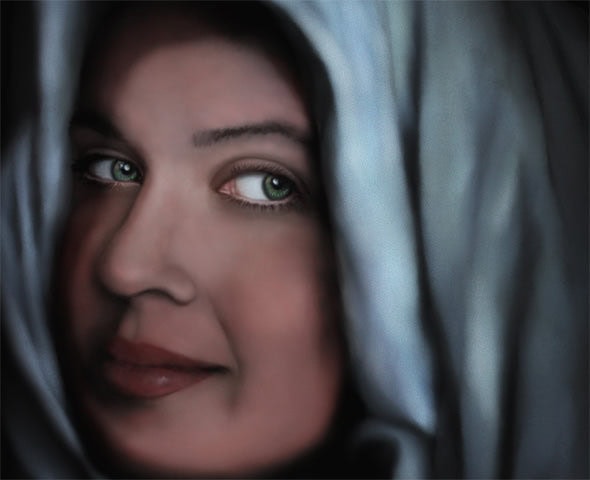
I painted the hood in this portrait using a very soft brush, resulting in almost no texture. Instead of spending hours working on it with a fine brush, I used a custom paper and Painter’s Surface Texture tool. I also wanted to deepen the mood, and this tool’s lighting feature helped with that.
The Texturizing Process
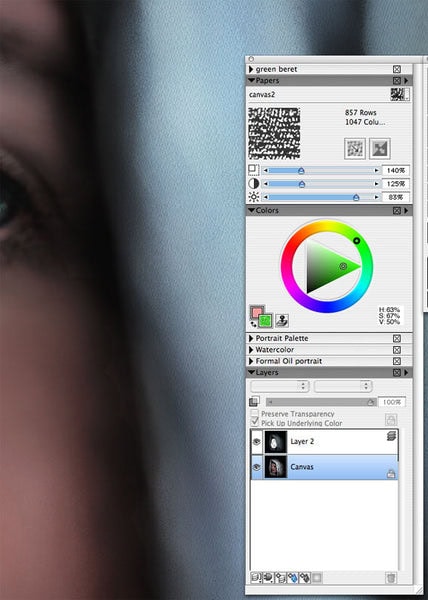
Since I’m only applying texture to part of the image, I duplicated the image onto a layer and made changes there. I applied texture to the entire image and then erased the face area to let the original version show through. To duplicate the base layer, select all (Select > All), copy (Edit > Copy), and paste in place (Edit > Paste in Place). Next, select a paper texture. If the paper palette isn’t visible, go to Window > Library Palettes > Show Papers. Choose a high-contrast paper. I used one created from a photo of a canvas, but you can use any paper. Adjust the paper scale using the slider in the Papers palette, which works together with the Surface Texture tool.
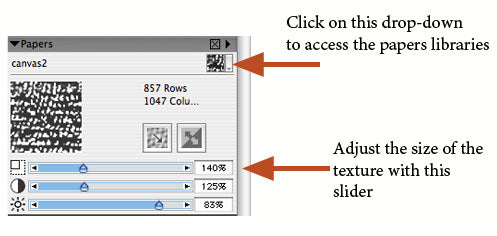
The Surface Texture tool uses paper settings from the Papers palette, so you need to tweak both dialogues together. Once your paper is selected, apply the texture by going to Effects > Surface Control > Apply Surface Texture.
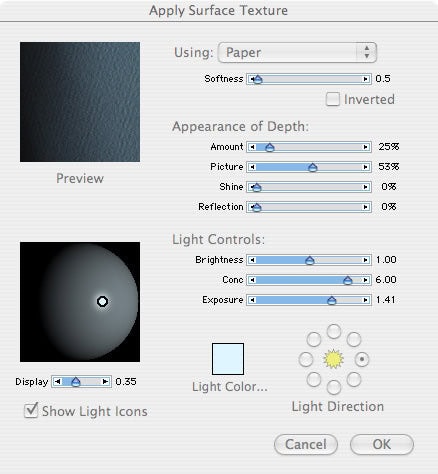
Choose “Using: Paper” to use the selected paper texture. Follow the other settings as shown, and experiment as needed. Remember, a little goes a long way in the Surface Texture tool. The preview may not always reflect the final result, so it’s a process of trial and error. Adjust the texture size with the Papers palette slider. You don’t need to use the lighting controls, but I adjusted them to match the lighting in my picture. Once satisfied, click Ok.
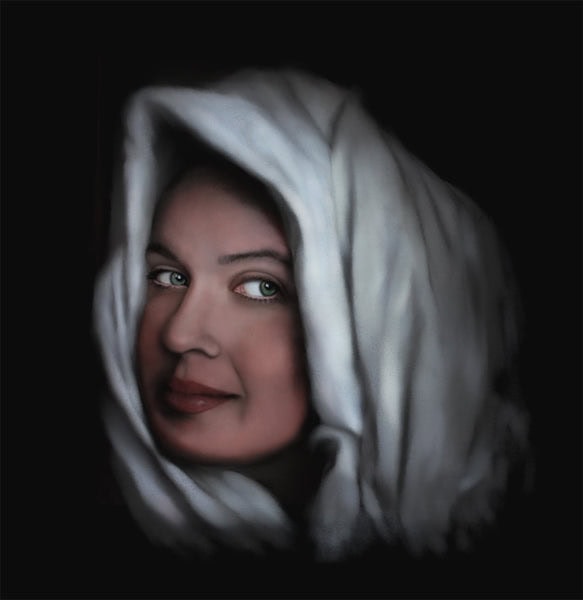
Now that I’ve applied the Surface Texture to the entire image on the duplicate layer, I’ll use the Eraser to remove the texture from the face area, leaving the hood textured. A soft eraser works best for this, but you could also use a layer mask for a non-destructive approach. I decided to leave the right side of her face shadowed, creating a spotlight effect. Here’s the final result:
For more in-depth Photoshop tutorials and tips, check out our comprehensive Photoshop guide. For other photography tips and tricks, visit our Photo Mastery blog.