This article was originally published on Digital Image Magazine in Ma7 2011 and is preserved here for historical reference. While the tools or trends may have evolved, the perspective they reflect remains part of my journey in the photographic world.
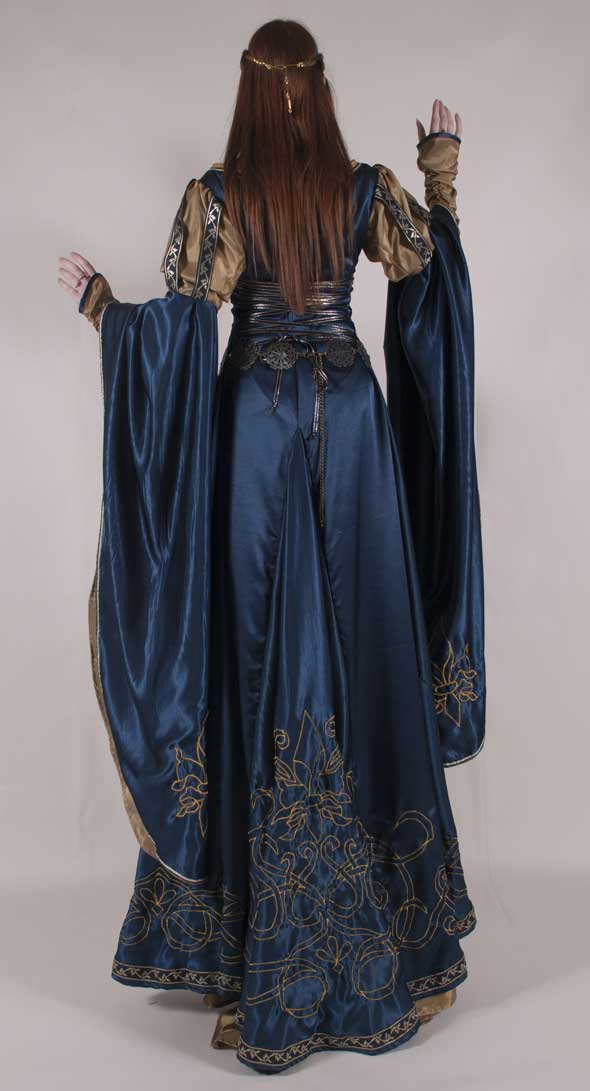
Today I came upon the photo above, by Deviant Art stock artist Elandria, and decided I just had to create a photomanipulation with it. For this tutorial, I’m going to emphasize the thought process, more than the actual Photoshopping. I have no idea where I’m going with this photo. So let’s get started!
First, I’ll separate the image of the woman in the blue dress from the background. The background, in this case, is nearly one color, so I’ll start with the magic wand to select the majority of the background quickly. Make sure “contiguous” is checked on. I used a tolerance setting of 30, which works well, but one of her hand disappears, since it is flesh toned and so is the background (this is why a lime green background–a green screen– is used for this sort of work). Once the selection is made, hit the Q key for Quick Mask. You can make the Quick Mask any color you like; mine is green.
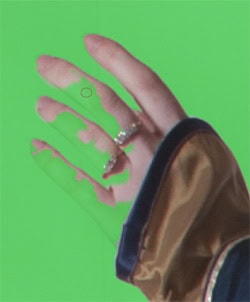
In Quick Mask mode, you can see where the Magic Wand got a little too aggressive. Paint over the missing fingers with white to recover them.
Zoom in and clean up the edge of the mask. Paint with white to recover areas; paint with black to mask out unwanted areas.
Once the edge is all cleaned up, tap the Q key again. This returns you to select mode, and you’ll see the “marching ants” defining the selection edge. At this point, we’ve selected the background. Go Select > Inverse to select the figure. Now, let’s find a setting for our figure.
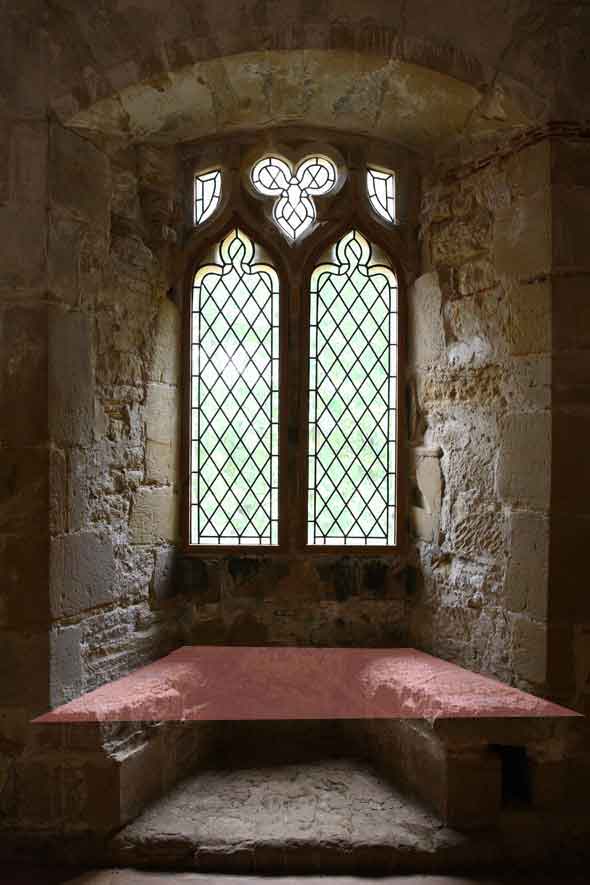
For this, I turn to my ever-growing collection of stock photos. I keep these on my hard drive, and add to the collection whenever I see a stock photo (on Deviant Art, Morguefile, sxc.hu, etc.) that catches my eye. The images are organized into a large library of folders (Maps, Globes, Clocks, Rocks, Seascapes, Landscapes, etc.). Keeping organized really helps when it’s time to look for an image, as we’re doing right now. I have several promising folders for this image. Since she’s in Medieval garb, I’ll look in my Castles folder, and maybe the Cathedrals folder. She seems to be looking out a window, at least in my mind, so I look in the Windows folder, and find this image:
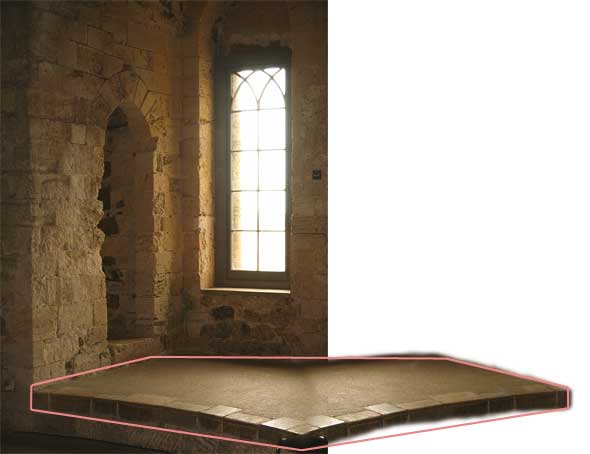
This will become the main setting for the final photomanipulation. The pink area shows where I’ll be adding a new floor. Stock used with permission by xNickixstockx on Deviant Art.
I go back to the selected image of Elandria, and go Cmd+C (or Cntl+C on Windows) to copy. Then I paste it into the window image. I resize the figure a bit using Edit > Transform > Scale. After moving her around a bit, I decide that she needs a higher floor to stand on. I will grab a floor from another image on my hard drive. After adding the floor, I’ll crop the bottom of the window image. First, let’s find a new floor.
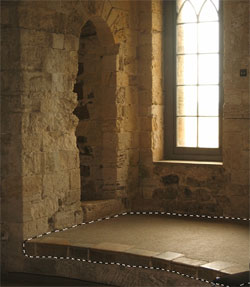
This image, by stock artist MirandaRose-stock on Deviant Art, shows a nice floor under a lit window. It’s a good match for our renovation project.
This is a good example of how you need to adapt images to suit your purposes sometimes. This flooring looks good, but it’s not the right polygonal shape (see the pink shape, above). What I’ll do is copy it to another layer, and then flip it horizontally. Then I’ll move the copy until left and right halves make a shape similar to the pink polygon.
Next I copy and paste this new flooring into the main image of the castle window (see below). After pasting, it appears in the middle of the image, as you see here. The arrows show where I’ll be moving it. It doesn’t match the original shape exactly. But I kind of like the way it comes forward to a point, so I’ll go with that. For fine tuning, I’ll use the Edit > Transform > Warp tool.
The new floor matches pretty closely, though it comes forward to a point, unlike the pink shape I made earlier.
Here’s the new floor, ready to lower into place.
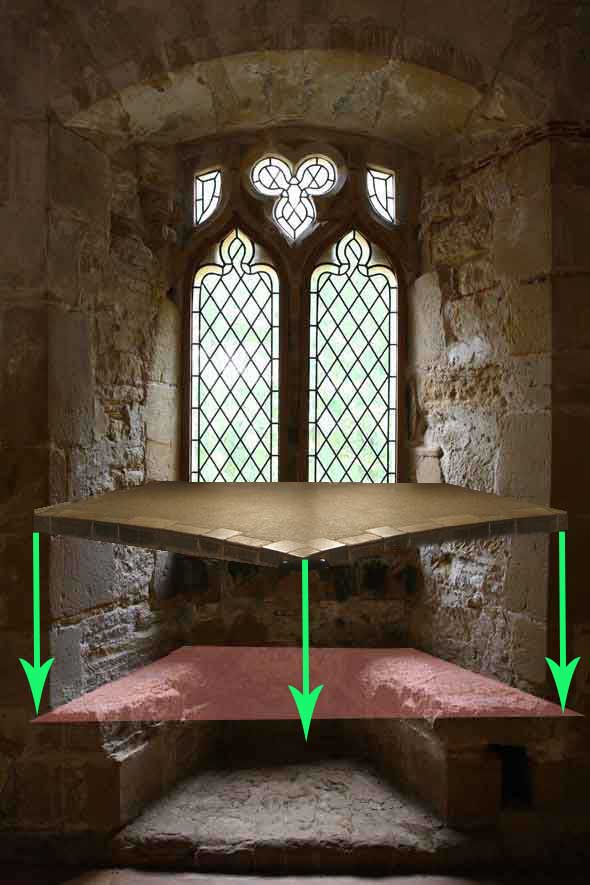
I may need to use the Warp transform a bit, but this flooring should pop right into place. Good enough for government work, as they say.
Now I copy the image of Elandria into the setting (below). This concludes Step One. Next week, we’ll give Elandria something to look at out the window!
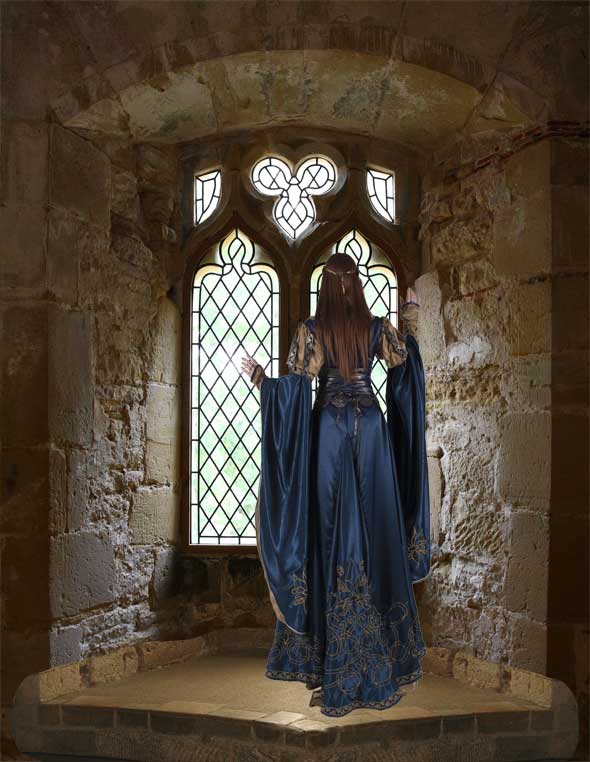
Step One, complete. Next we’ll change the window view, and some other neat stuff.
Want to elevate your images beyond the moment they were captured? Step into the world of creative editing on the Post-Processing page.
