This article was originally published on Digital Image Magazine and is preserved here for historical reference. While the tools or trends may have evolved, the perspective they reflect remains part of my journey in the photographic world.
Despite the old saw “The camera never lies,” cameras have been known to stretch the truth on occasion. Next time you’re getting ready to start a new painting based on a reference or stock photo, stop and give it a good, honest appraisal. For example, check out the portrait above, on the left. Her eyes seem incredibly big. In fact, when you compare the size of the eyes to the mouth, or notice the improbably small chin, you’ll realize this image suffers from lens distortion. Luckily, it’s easily corrected in Photoshop.
How distortion happens
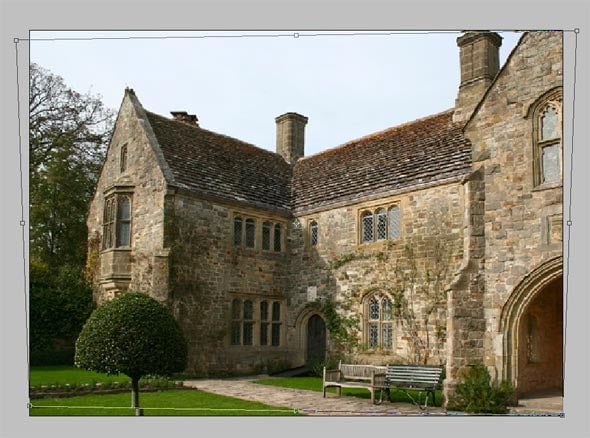
It helps to know a little bit about what causes lens distortion, so you’ll be on the alert for likely suspects in your reference photo collection. Typically, distortion happens when, as in the first example, the camera is physically very close to the subject. A “fish-eye lens” effect can occur. The effect can be made worse by using a wide-angle (28mm, for instance) lens to take a close-up portrait. A zoom or telephoto lens can help you get “close” without distortion. When your subject is very large (such as a house or castle), vertical lines are likely to converge, causing the building to look like it’s falling backwards. Take a look at this next example.
There are several ways to correct this in Photoshop. Beginning with CS2, Photoshop began to include the Lens Distortion filter (Filter > Distortion > Lens Distortion). For simple keystone distortion, however, I prefer the older and simpler Perspective transform tool (Edit > Transform > Perspective). This won’t work on the Background layer, by the way. Double-click on the Background layer and a dialogue will pop up, with the name changed to Layer 0. Click OK to accept, and then you can access the Perspective tool. You could, instead, create a copy of the Background layer and give it a name (”Background copy” won’t work).
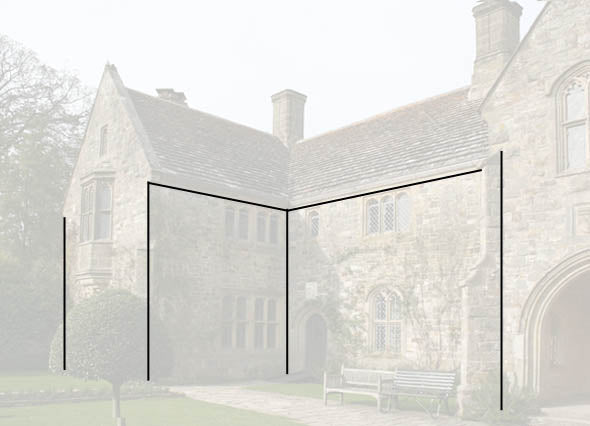
Since this building shows an “upside down keystone” (lines converge inward, not outward), you correct it by dragging the top corners outward. If you were fixing a photo of a building shot straight-on, you’d be done. But in this photo the camera is angled, looking from one end of the building to the other. This causes uneven keystoning. To compensate, you’ll need to adjust the line of the bottom two handles, as shown.
A similar sort of problem is shown in our next example. Because this is a 3/4 view, we expect the closer eye to appear larger than the far eye. In this case, the difference is too much, causing the model to appear slightly deformed.

The problem is easily corrected, once again, with the perspective tool. You’ll need to crop your image once the correction is made. Here you see what it looks like before the crop.

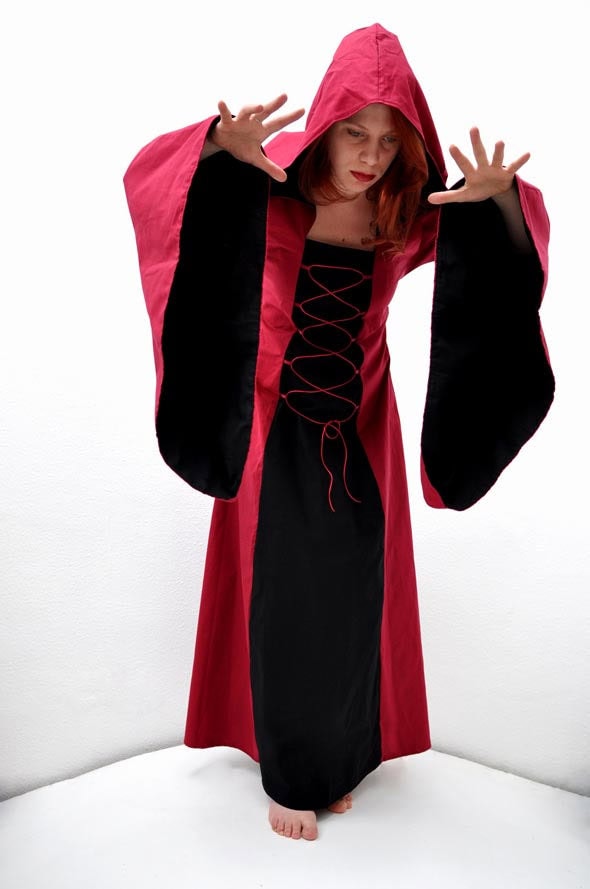
Sometimes lens distortion adds to a photo’s effectiveness. In this stock photo, the camera is close to the subject, and pointing downwards. This makes her upper body much larger than her lower body. But in this case, that may be just the effect you want. You may even want to exaggerate it further (with the Perspective tool), so that she seems to be looming over a cauldron or a crystal ball. Distortion in this case adds to her menacing appearance.
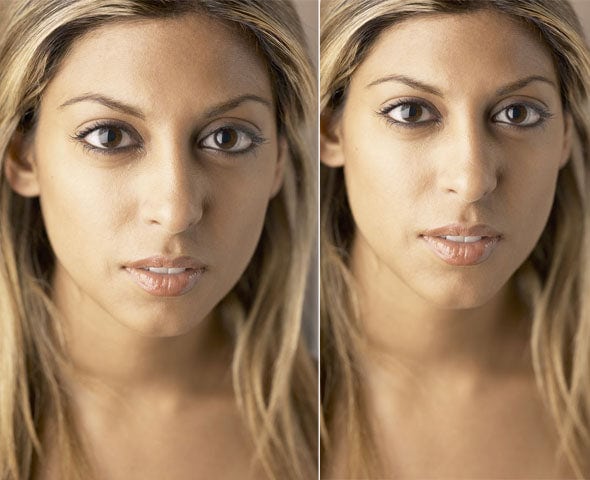
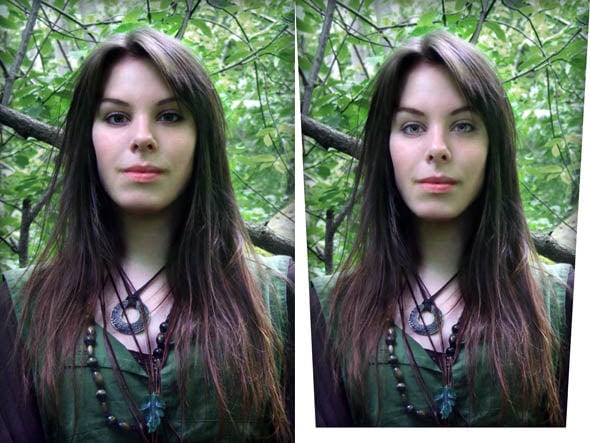
In our last example, the distortion wasn’t obvious to me at all until I noticed how large the subject chin appeared. Similar to the sorceress, above, the camera is very close, but this time it’s pointed upwards. This causes her features to be distorted (left). On the right, I’ve corrected the distortion with the Perspective tool. I’ve also lightened her irises with the Dodge tool.
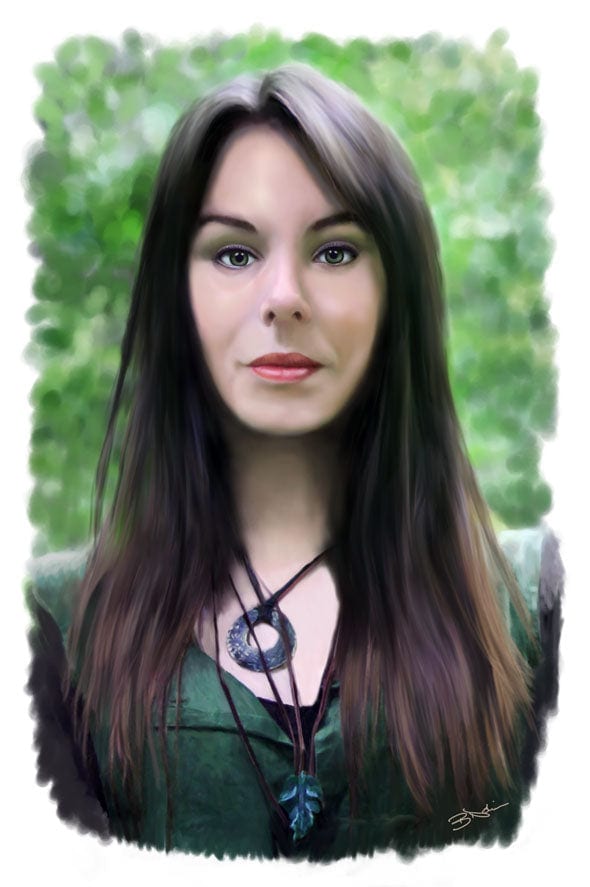
And here’s the painting I created in Corel Photoshop, based on the corrected image.
For more in-depth Photoshop tutorials and tips, check out our comprehensive Photoshop guide. For other photography tips and tricks, visit our Photo Mastery blog.
