This article was originally published on Digital Image Magazine in August 2010 and is preserved here for historical reference. While the tools or trends may have evolved, the perspective they reflect remains part of my journey in the photographic world.
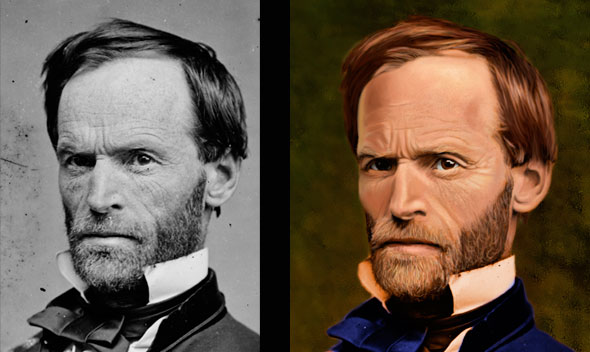
Learn how to take a black and white photo and turn it into a full-color painting.
A while back (in this article), we looked at how to use Painter’s composite methods (layer blending modes) to colorize an old vintage black and white photograph. While that method is good (and fast) for applying fairly realistic color to a photo, it doesn’t really result in a painting. In this tutorial, we’ll look at how to use the original photo as an underpainting, adding color to layers above it to achieve an honest-to-goodness painting. This method takes a lot longer (for me, at least), and is much more challenging, because you need to create realistic skin tones by mixing colors. No simple color cloning this time!
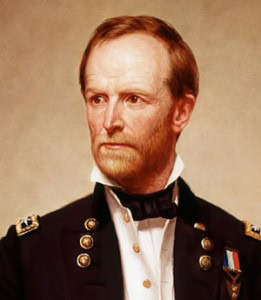
A contemporary oil portrait of Sherman.
This is a good way, I think, to wean yourself off of color cloning, and begin to trust your own color sense. That’s the main reason I tackled this old photo of General W.T. Sherman. Adding to the challenge is the fact that Civil War-era photography did not have much depth of field or dynamic range. Values tend to be either jet black or pure white, with little in between. So you need to use your imagination a bit, and paint what isn’t there. In this case, for instance, a contemporary painting of Sherman shows that he was a redhead, with a fair complexion. Looking at the photo alone, you might not pick that up. And you might assume that that’s grey in his beard. It’s actually blondish strands mixed with orange-red.
To begin, I searched on the internet for Civil War photographs. There’s a lot on the government’s archive site, and you can find this rather high-resolution photo of Sherman here.
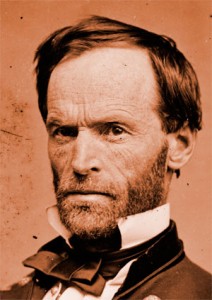
The sepia toning works as an underpainting.
These photos are in the public domain, so they’re free to use. The tiff file I downloaded was a grayscale image, so the first thing I did was to change it to a color image (go Image > Mode > RGB color). Next, we’ll turn it into a sepia-toned image. This will work like a toned underpainting does in traditional oil painting. Add an adjustment layer and choose Hue/Saturation as your adjustment type. Move the hue slider until the color turns brown. You’ll probably need to switch on Colorize.
Once you’ve got your image sepia-ized, you can open it up in Painter. (I use Photoshop for the usual photo adjustments, and the great number of things that it is much better at than Painter. You can make color adjustments in Painter, as well.) To get started with the painting, I used a Color layer (a layer with composite mode switched to Color — see this article if you need a refresher) to begin changing the sepia tone into a skin tone. I also used a Colorize layer. But then I dropped the layers back to the Canvas. Now it was time to start applying opaque paint. For me, this is still the hard part. Learning how to paint skin tones is a huge challenge for me, and a lot of people. There is a tutorial in two parts, available for free download here and here, put together very nicely by artist Lauren Cannon.
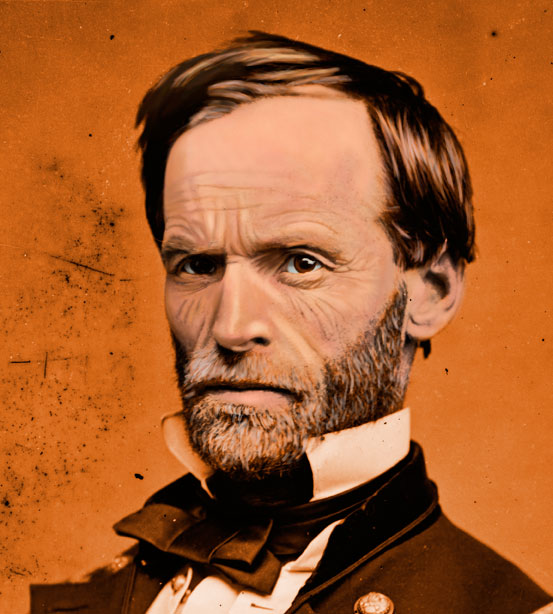
Here I’ve finished the Color and Colorize layer work, and am beginning to lay down opaque color, on a layer above the canvas.
My goal here is to come up with a ruddy, fair-skinned complexion, with freckles (I can see them in the photo). Before I go any further, I’m going to put the background in. I really should’ve done that right from the start, since the background colors will affect and interact with the flesh tones. Back in Photoshop, I use the Quick mask and a black, soft-edged brush at 100% opacity to cover the entire figure. When I turn off Quick Mask (press Q), the figure is selected. I copy it, and paste it, which puts a copy onto a new layer. Now I have the General by himself on a layer above the bottom layer, which is now my background. Working quickly, I cover the background with a subdued olive green, which will help the skin tone to pop a bit. This background is rather dull, and so I open a texture file. This is nothing more than a photograph of some interesting texturized stuff. Here’s the image I used:
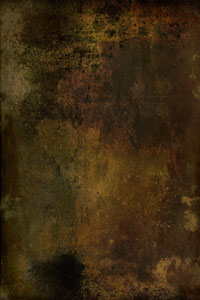
A simple grungy-looking texture from somewhere in cyberspace.
Here’s how you use such a file. Select all, then copy the grungy image. Switch to your portrait. Click on the bottom (background) layer. Do CMD+V or CTL+V to paste. This creates a layer with your texture on it. We’ll need to make it bigger, most likely, to fill the image size. Go Edit > Transform > Scale, and drag the handles to make it fill the image. Now, turn the Layer Blending Mode to Overlay. That’s the secret bit that these sort of tutorials usually leave out. Overlay causes the texture to lay on top of the background you painted. You see them both at the same time. Adjust the opacity as you see fit. Too much texture can be distracting. In my case, I ran two filters on the texture layer: Paint Daubs, and then Ocean Ripples. This took some of the detail out without softening it too much. Here’s what the layers palette looks like at this point.
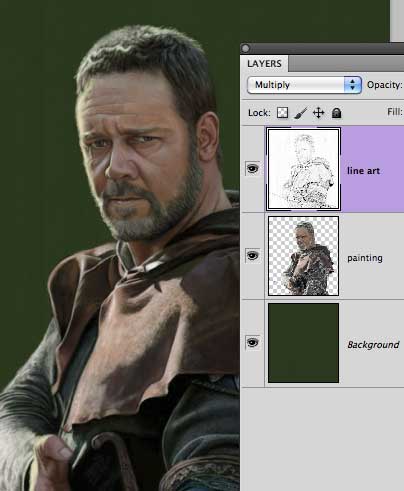
Notice the Overlay blending mode, and the Opacity setting.
The General’s uniform is next. It’s not brown, it’s blue. So again, press Q for Quick Mask, and, on the Sherman layer, paint with black to cover his uniform. Press Q again to bring up the dancing ants. Now insert an adjustment layer, pick Hue/Saturation, and slide until he’s in his Union suit. You can drop the adjustment layer when you’re done with that. Okay, so we’ve managed to kill some time, and avoided actually painting the dreaded skin tones. Now there’s nothing for it, Mr. Frodo, as Sam would say. We must enter the land of Mordor…er, start the skin painting. Ready?
Have you ever seen a portrait tutorial, and they have these little swatches of color that seem to be right on the painting? And they never tell you what those are (at least not the one’s I’ve read). I finally figured it out: the swatches are on a layer by themselves. You pick your skintones and place them in swatches on a layer, and then lock it so you don’t accidentally paint on it. You want to throw that layer away at the end. To come up with my skin tone swatches, I found a photo of a guy with similar skin and hair color to the General: Kirk Douglas in “Lust for Life.” He’s very ruddy, no? And looks like he’s been drinking the paint thinner, too.
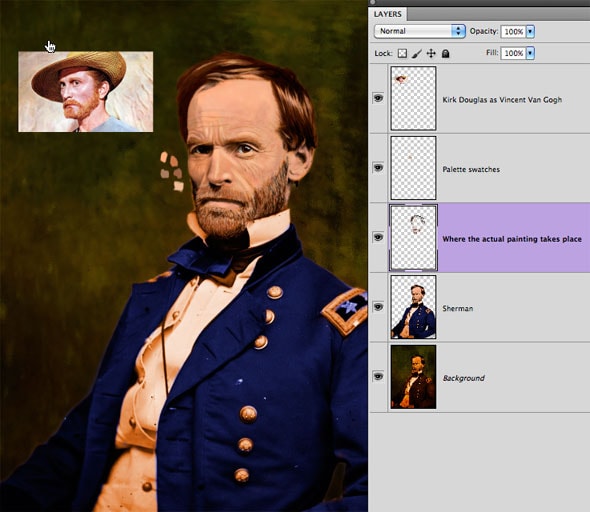
Vincent Van Gogh and General Sherman. What a team.
At this point I worked for three or four hours, on a layer above the Sherman layer, slowly working up the painting. The tutorials on skin tone, mentioned above, may be very helpful, so check them out. She explains better than I could what colors to use where, etc.
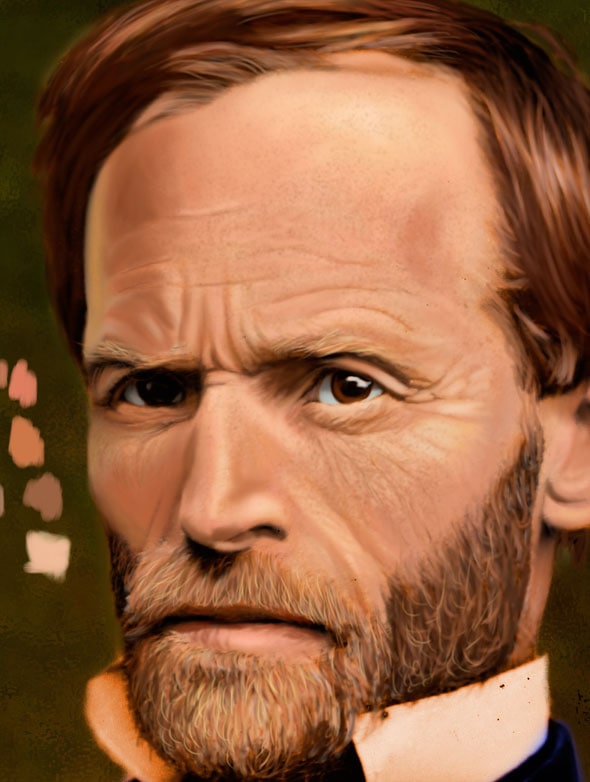
A close-up, showing the wrinkles and freckles, etc.
At the end, I used an Airbrush, the Fine Spray variant, turned down to barely a trickle, very low opacity, and just tap-tap-tapped on the General’s forehead to give him freckles. I did this on a separate layer in case I screwed it up. Also, that way I could turn down their opacity if need be. The other note I would make is, notice how I lightened up his hair. It’s brownish red, with highlights. I think the General should fire his barber, don’t you? Oh wait, back then, the barber was also the doctor… Never mind. I hope you found this helpful, or at least interesting.
