This article was originally published on Digital Image Magazine in June 2009 and is preserved here for historical reference. While the tools or trends may have evolved, the perspective they reflect remains part of my journey in the photographic world.
Corel Painter has several ways to quickly generate complex, realistic textures that might be difficult or impossible to accomplish by hand. Painter’s tools for texture include the Image Hose, patterns, weaves, and papers. Today we’ll look at how to use paper textures in Painter.
First, let’s take a look at the Papers palette. If it’s not currently visible, go Window > Library Palettes > Show Papers.
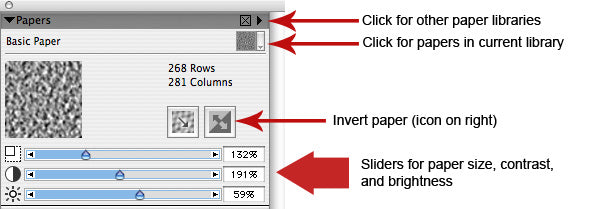
The triangle in the upper right of the palette gives you a drop down, where you’ll see “Open Library…”. Click on that to open a different library of papers. For now, we’ll assume you have the default set of papers open, and use those papers for this exercise. The dropdown below that opens your current library, allowing you to choose a different paper. The invert button allows you to paint either the negative or positive space in your paper’s design. The sliders at the bottom allow you change the size, contrast, and brightness. Move them around and you’ll see the effects in the preview window.
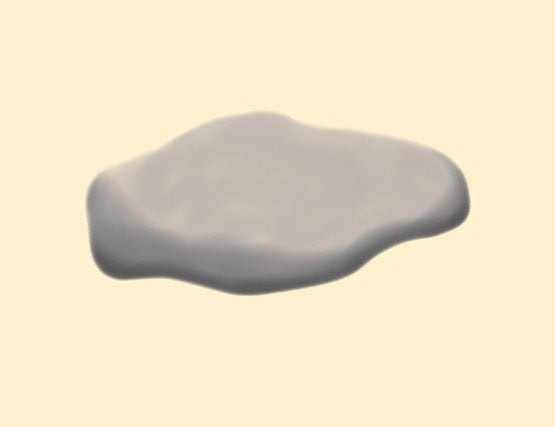
To begin, create a new document (File > New). A good size is 4 x 4 inches at 200 ppi. Click inside the Paper Color preview area, and a color picker appears. Select a white or off-white color for your paper. Now click OK. Use the lasso selection tool to draw a rock or stone shape, as shown below. To give your stone a soft edge, go Select > Feather… and choose 3 pixels. Paint a base grey color using the Digital Airbrush set to about 25px, at a low opacity. Once it’s all grey, choose a dark grey, and paint around the edges to give it some roundness.
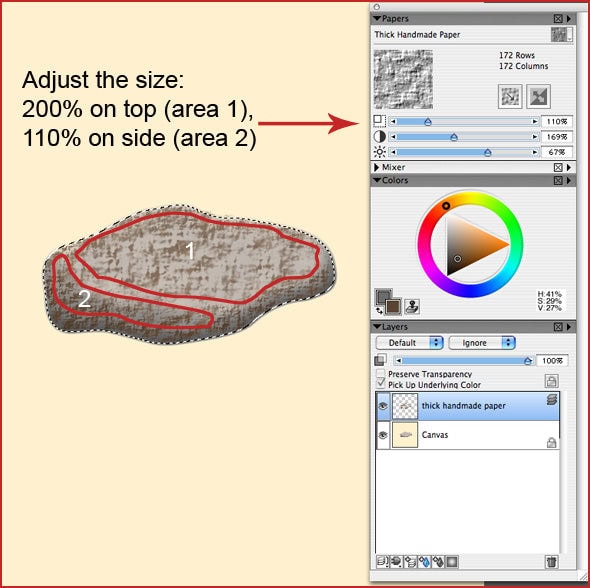
Insert a new layer by clicking on the new layer button at the bottom of the layer palette, or go Layer > New Layer. If the Layer palette isn’t visible, go Window > Show Layers. Click on the second dropdown (as explained above) to access the papers in your current library. Choose Large Handmade Paper, which ships with Painter. Now, we need a brush that works with paper texture, and for that any brush that has a Grain control in the tool bar will work. Let’s use the Chalk variant called Variable Chalk. Make it about 40-50 pixels big, opacity around 30 percent, and (very important) make sure the Grain is set to 11 or so. Move the size slider to 200% on the paper palette, as shown, to paint the top area of the stone. Move it 110% to paint the sides. This helps to add to the 3D illusion. Also, use a darker color when painting the sides, since this area is in shadow.
Note: if you find that the grain is filling right in, or isn’t painting much at all, make sure your Brush Tracking is set. Go Preferences > Brush tracking, and stroke in the window provided to calibrate your stylus. This seems to really help with painting on textured papers.
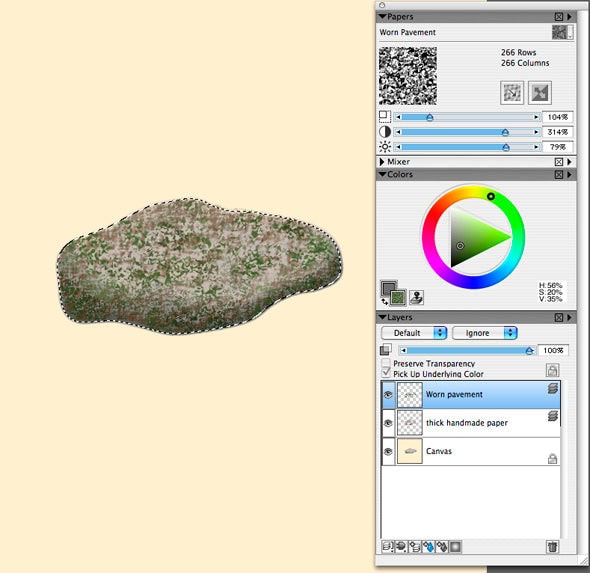
Let’s add a new layer. We’re going to use a separate layer for each paper. This way you have the flexibility to change each layer’s opacity and/or blending mode. Experiment with different settings and you’ll see how helpful this can be for building up deep, realistic textures. For this second layer, change the paper. Choose Worn Pavement, and this time use a grey-green color. Change the paper size to around 150% for the top area, and then use a darker color at 100% for the sides. If at any point you’re not happy with what you’ve painted, grab the eraser: you’ll only be erasing that one layer’s contents. Or delete the layer and start again.
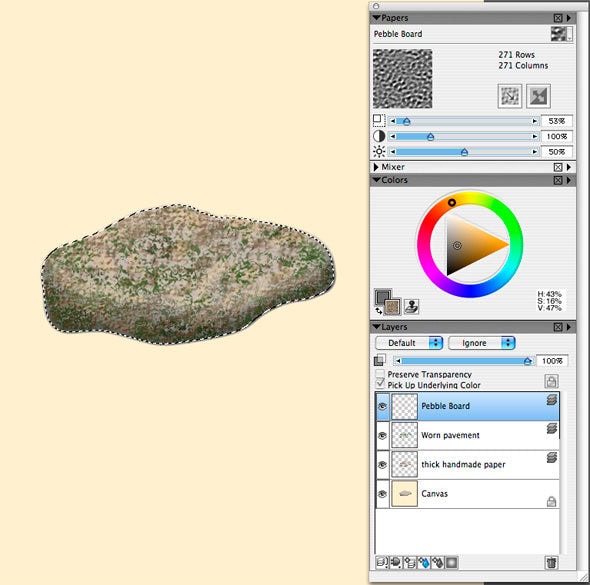
Add a third layer, and this time use the Pebble Board paper. Use a light color this time, and use a paper size around 65% for the top. Then darken it, and use a size around 50%. We’re building up detail, beginning with larger shapes on the first layer, and smaller shapes as we move up.
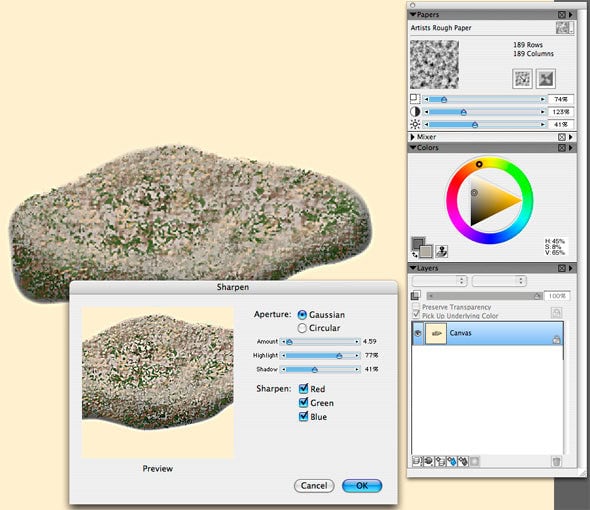
For our fourth layer, use Artists Rough Paper, and go even lighter with your color (see below), and smaller with this paper size. This time, concentrate on the top edge and the near edge of the top surface, to help give it some more dimensionality. Once that’s done, go Layer > Drop All.

Make sure that your selection remains active throughout all of this. Now that you’ve flattened your image, the only layer you have is the one called Canvas. Save. The next step might seem a bit counter-intuitive, but the sharpen step seems to help the next step (smearing) work really well. Go Effects > Focus > Sharpen, and use the settings you see here.
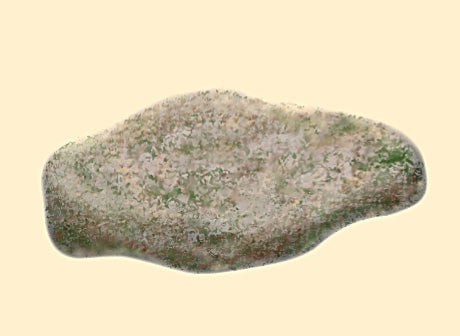
With the Blender variant called Just Add Water set at 20% opacity and 0% resat, gently stroke away at the stone, blending details into each other. Don’t lose all the detail, just soften it. It should look like this:
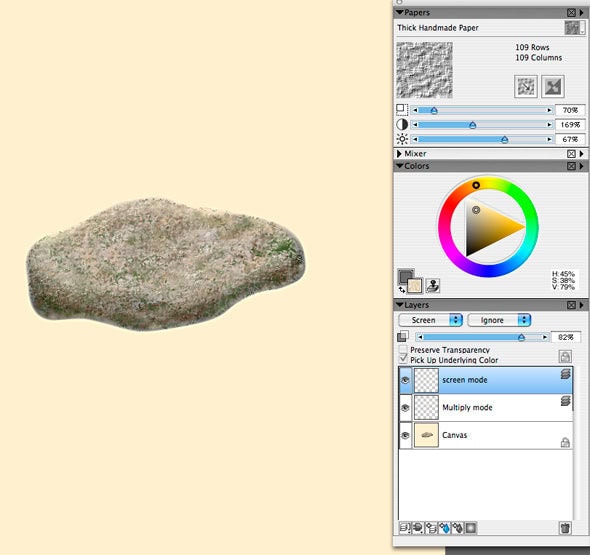
We’re nearly done. This last part really makes the stone look realistic. Add a layer, and change the blending mode to Multiply. Use the Large Handmade Paper again, with a paper size of 70%. Use a dark brown color with the Variable Chalk. Add details all over. Add a second layer, this time use Screen blending mode. Now use a light yellow color. You may want to turn the opacity down a bit, as I’ve done here. The result is a pretty darn convincing stone, with pits and highlights. You can continue adding details, if you like. The more you add, the more real it becomes. We’ll finish the stone by adding a shadow.
To add a shadow, first go Layer > Drop all, then Select > Invert. Now you are selecting everything *but* the stone. Choose a nice dark gray-blue, and add a shadow with the Digital Airbrush. That’s it!
For more in-depth Photoshop tutorials and tips, check out our comprehensive Photoshop guide. For other photography tips and tricks, visit our Photo Mastery blog.
