As photographers or digital content creators, we sometimes need to protect the identity of our subjects or add a dash of mystery to our images. Blurring faces can be an effective way to achieve this. While Photoshop offers excellent tools to blur faces, I always prefer to do all my editing in Lightroom. Although Lightroom doesn’t have a direct blurring tool like Photoshop, you can still blur faces using a clever combination of available tools, including blur effects with features like the blur tool, Lens Blur, Focus Range, Visualize Depth and Refinement sliders. Let’s dive into the process.
The lens blur tool can be used for aesthetic blur and bokeh adjustments, allowing you to refine the blur effect and achieve the desired look.
Step-by-Step Guide to Blurring Faces in Lightroom
Step 1: Select the Photo
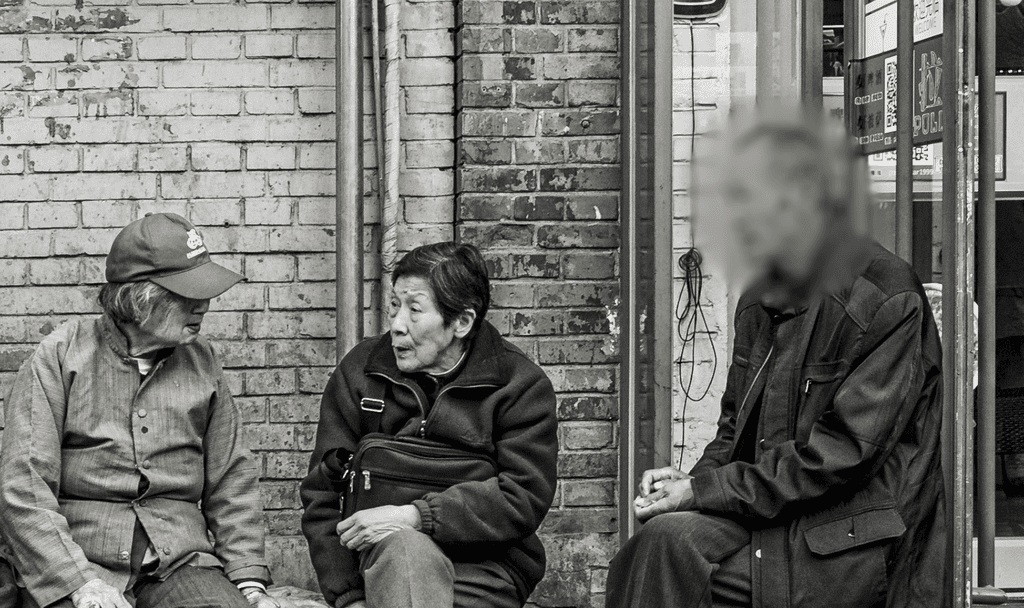
First, import your image into Lightroom and select it in the library for editing. For this example, I’m using one of my photos from China, precisely the image of four older adults sitting in front of a restaurant in Beijing. If we wanted to lens blur the face and hide the identity of one of these individuals, this is how we would do it. [You can view the image here].
Step 2: Open the Develop Module
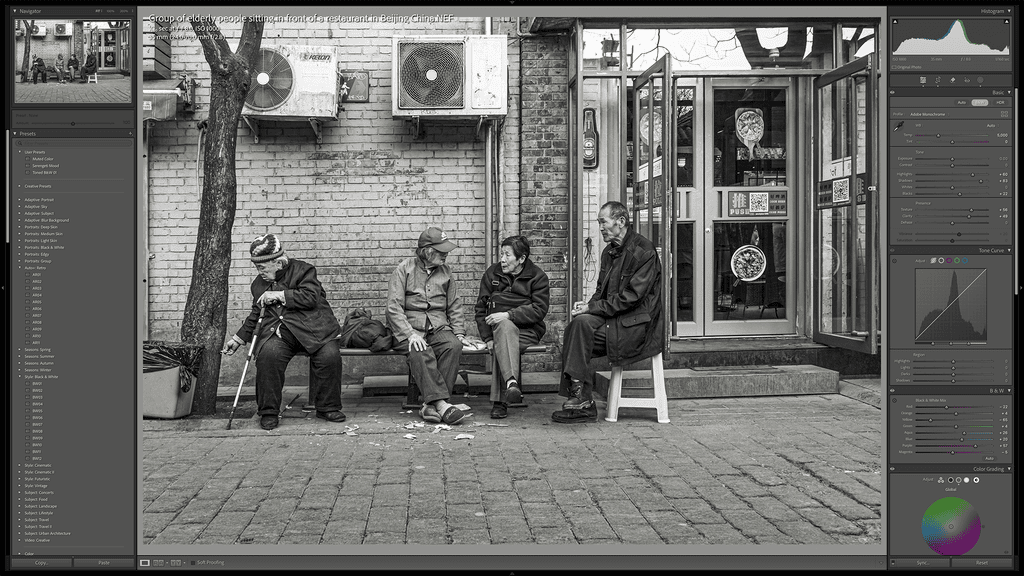
Select a photo in which you want to blur the face.
With your photo selected, hit up the Develop Module. Click ‘Develop’ at the top or press ‘D’ on your keyboard.
Step 3: Create a Mask and Select Brush
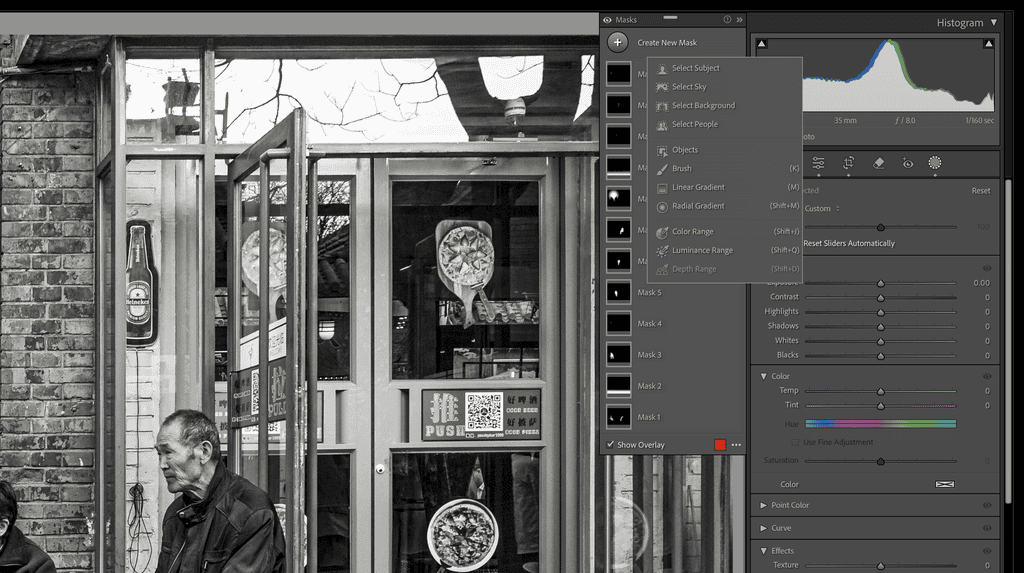
Create a Lightroom mask with an adjustment brush
In the Lightroom Classic, you’ll need to create a mask first. Click on the Masking tool icon (circle icon) in the toolbar on the right. Then select ‘Brush’ from the options. Use the brush panel to choose a brush to blur.
Step 4: Configure the Mask Settings
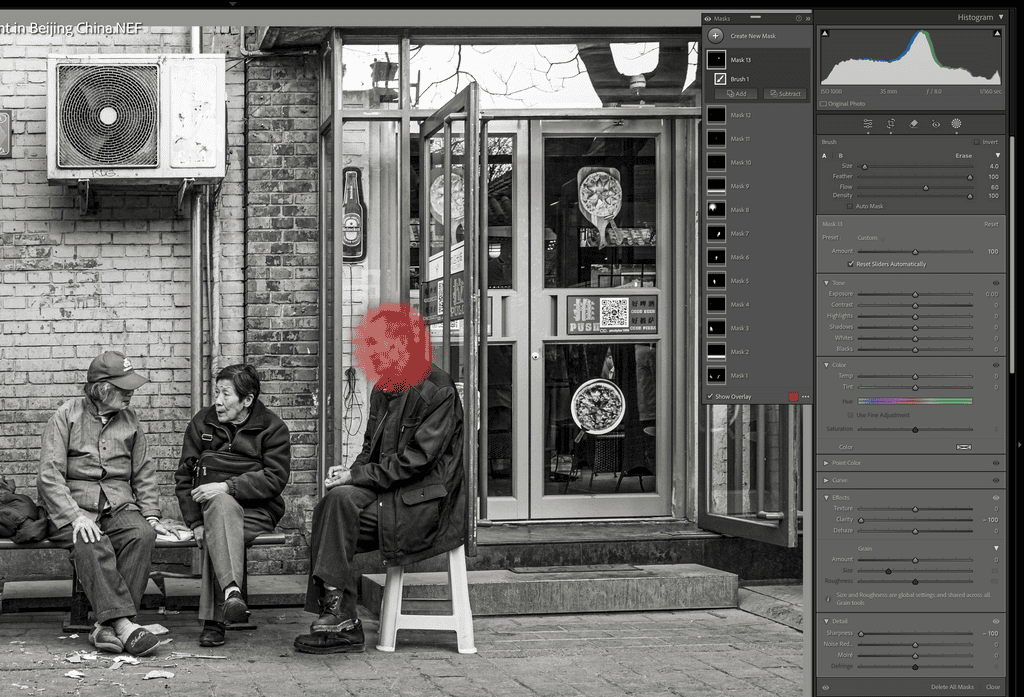
Lightroom Clarity and Sharpness are set to -100
Adjust the mask settings before you start painting the face on the image. Set Clarity and Sharpness to -100. This will blur the area you paint over. However, you might find tBlurthe Blur isn’t enough, even at -100 Clarity and -100 Sharpness. Adjust the sharpness setting to achieve the desired blur effect.
Step 5: Paint Over the Face
Now, paint over the face you want to blur. A red overlay will indicate where the adjustments are being applied. If you make a mistake, hold down the ‘Alt’ key (the Option key on Mac) and paint over the image area to erase. Adjust the brush size for better control over the blurring process.
Step 6: Duplicate the Mask for More Blur
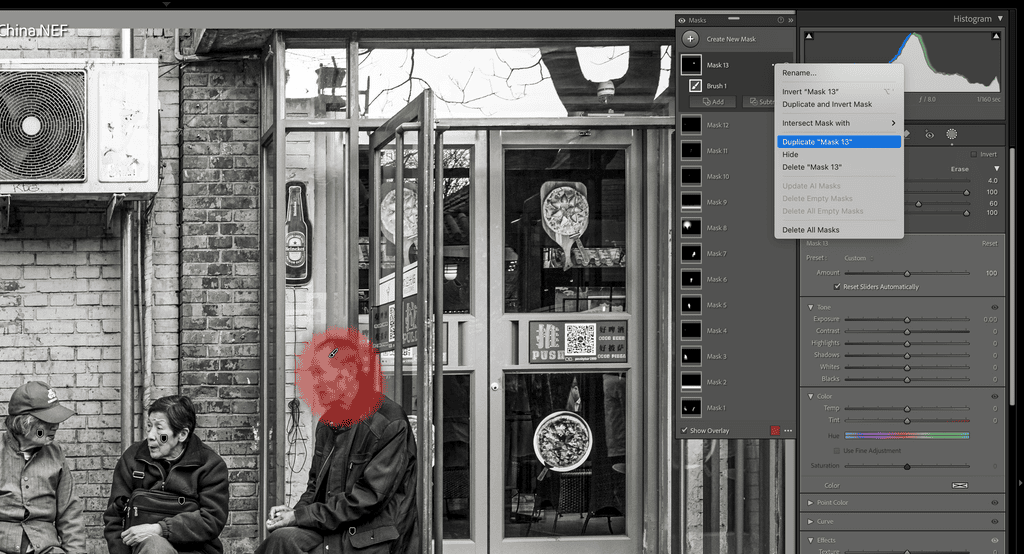
Duplicate your first mask to double the effect on the image.
If the Blurial Blur isn’t sufficient, you can duplicate the mask to increase the effect. Right-click on the mask (named ‘Blur Face’) in the Masks panel and select ‘Duplicate.’ You can do this multiple times. In my case, I duplicated the mask twice, creating ‘Blur Face Duplicate’ and ‘Blur Face Duplicate 2’ to achieve the desired blur. Lightroom’s new lens blur tool can also be used to add aesthetic blur and bokeh effects through an interactive and customizable experience. Use the depth map to refine the blur effects and ensure the focal range is accurate.
Step 7: Apply the Changes
Once you’re happy with the blur, click the “Done” button below the image. Your changes will be applied and saved.
Blurring faces in Lightroom is not just a technical process; it’s a creative one. By creating a mask and adjusting Clarity and Sharpness, you can add a touch of mystery or protect the identity of your subjects. Remember, a single pass might not be enough, so duplicating the mask can enhance bluBlurou’ll gain better control and create the perfect blur effect with practice. Don’t be afraid to experiment with different settings to find what works best for your images. Photography is an art—embrace the creativity and enjoy the process!
While this tutorial focuses on blurring faces, there’s more to explore in Lightroom. You might also be interested in learning how to blur backgrounds or create bokeh using AI tools. Check out my tutorial on adding bokeh in Lightroom for more details. Remember, I’m here to guide you through your photo editing journey. The lens blur and new lens blur tools are great alternatives for achieving aesthetic blur and bokeh adjustments. You also have the option to blur the entire photo for a dreamy ambiance or to remove unwanted elements.
My beginner Lightroom editing tutorial, which you can find, provides a general guide to using Lightroom to edit photos. It covers various editing techniques, including blurring faces, adjusting exposure, and enhancing colors.
