How to Enhance Eyes in Lightroom Mobile: A Step-by-Step Photo Editing Guide
In mobile photography, the ability to edit on the go with apps like Adobe Lightroom Mobile has revolutionized how we bring our photos to life, particularly in portrait photography. The subject’s eyes, often called the windows to the soul, are pivotal in any portrait. Their clarity, brightness, and depth can transform a good photo into an unforgettable one. This guide is dedicated to helping you master the tools and art of enhancing eyes in Lightroom Mobile, ensuring your subjects’ gaze is as captivating as intended.
I want to mention that the more advanced tools available in Lightroom CC Desktop, like the red eye correction tool and selective AI mask with people, are not available yet in Lightroom mobile. But it can all be done utilizing more conventional masking tools
Step 1: Initiating Your Edit in Lightroom Mobile
Launch Lightroom Mobile and select the photo you wish to edit from your photo library. This initial step is your gateway to transforming a simple snapshot into a masterpiece.
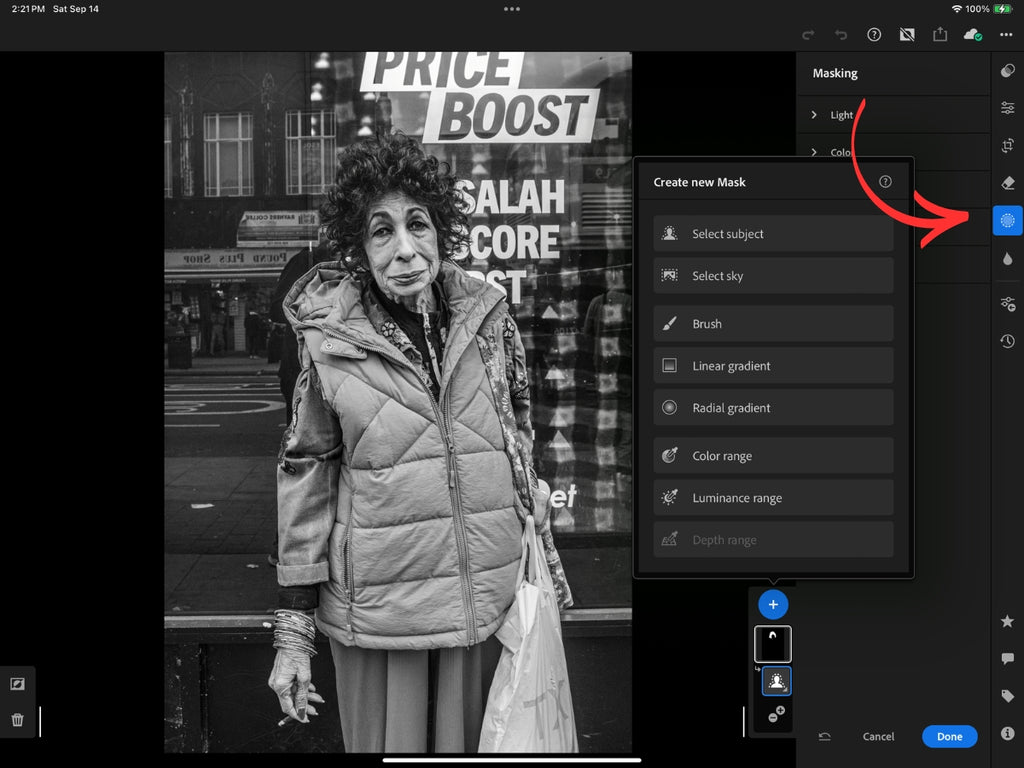
Step 2: Accessing Selective Edit Tools
Lightroom Mobile’s Selective Edit module is a treasure trove of advanced editing options. Tap the ‘Selective’ icon, symbolized by a circle with a dotted line, to unveil these powerful tools to create a mask.
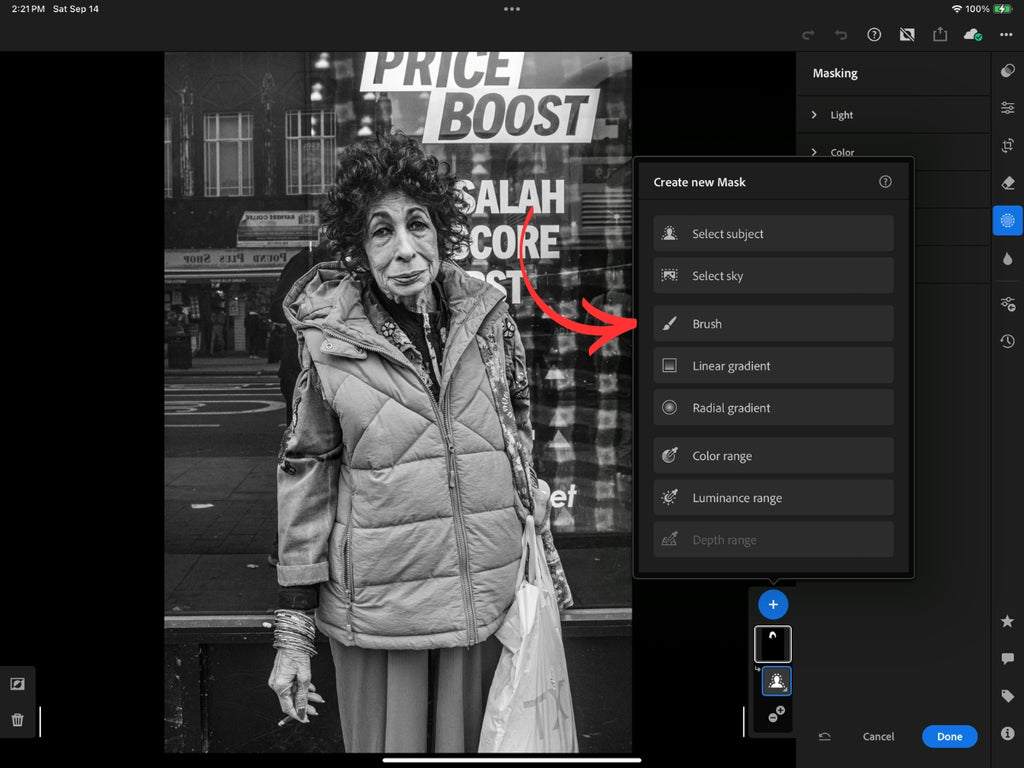
Step 3: Employing the Selective Edit Brush
Hit the ‘+’ icon, choose ‘Brush,’ and get ready to target the eyes precisely. Zoom in to the eyes prominently fill your screen, setting the stage for meticulous editing.
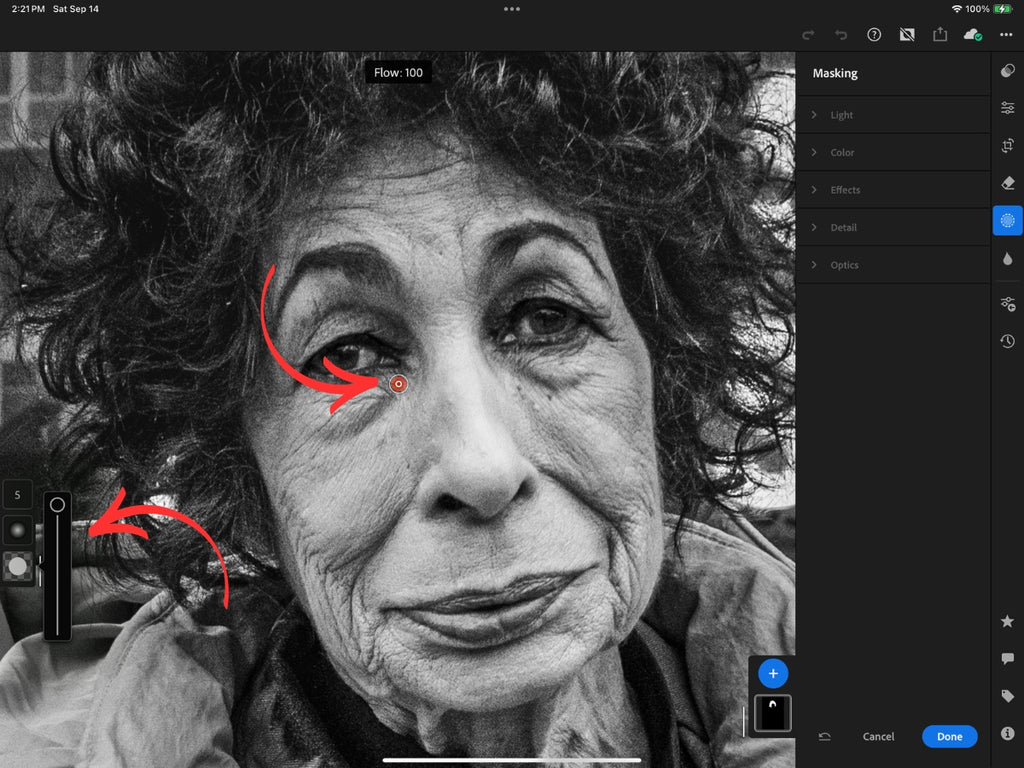
Step 4: Fine-Tuning Your Brush
Before you edit, adjust your brush size and feather to suit the eyes’ dimensions. This ensures your adjustments are as accurate as possible.
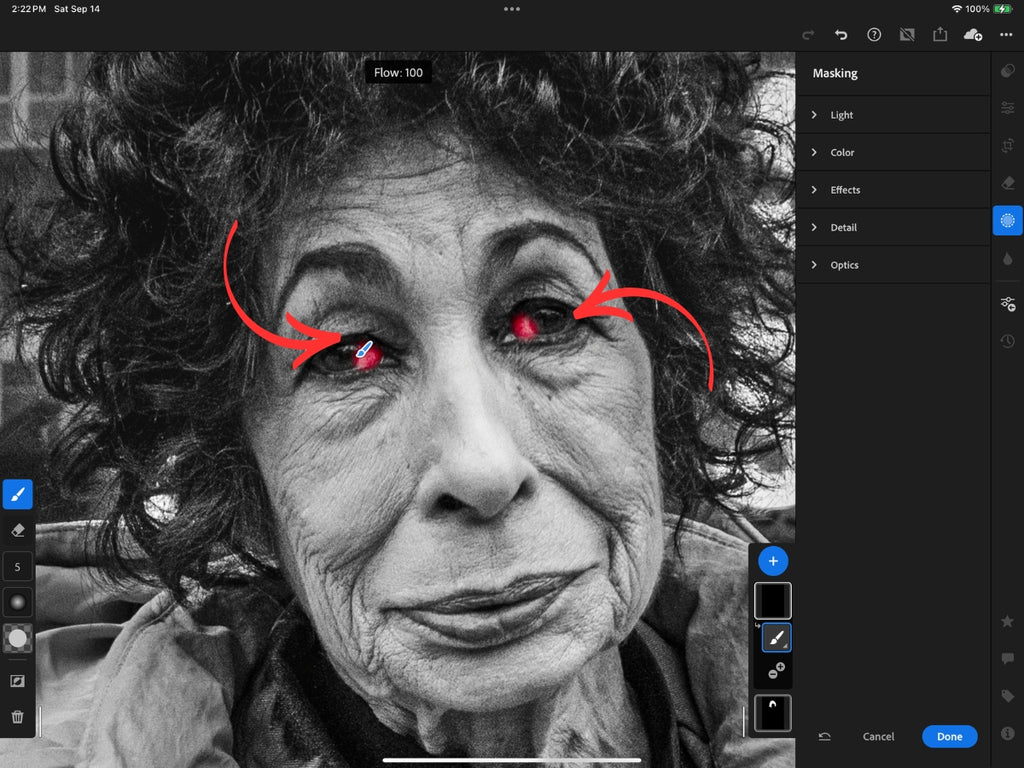
Step 5: Applying Your Edits
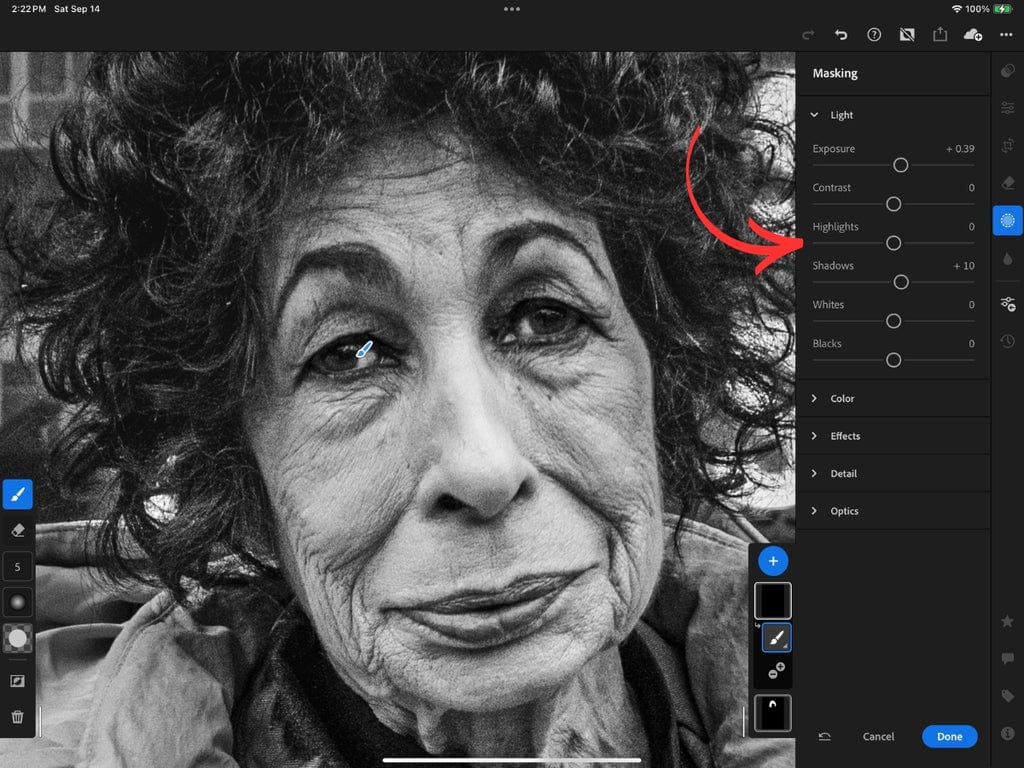
With your brush ready, carefully draw over the iris and sclera (the white part of the eye) to highlight the areas needing adjusting.
Step 6: Elevating the Eyes’ Appeal
It’s time to bring detail to the eyes to life. Boost the ‘Exposure’ and ‘Shadows’ to illuminate the gaze. Enhance the iris’s hue with the ‘Saturation’ slider, and use the ‘Temperature’ slider to correct any discoloration in the sclera, achieving a natural, vibrant look.
Step 7: Sharpening for Impact
Increase ‘Clarity’ and ‘Sharpness’ judiciously to give the eyes that compelling depth. The goal is to maintain realism while ensuring the eyes genuinely stand out.
Step 8: Consistency Across Both Eyes
Duplicate your adjustments to the other eye to ensure uniformity. This symmetry is crucial for a balanced, natural-looking photo edit.
Step 9: Final Touches to Your Portrait
With the eyes perfected, consider additional edits to your photo. Lightroom Mobile’s comprehensive suite of tools allows you to adjust exposure, contrast, color balance, and much more to complete your vision.
Step 10: Saving Your Artwork
Once you’re delighted with the edited photo, save it by tapping the ‘Share’ icon and selecting ‘Save to Device.’ Your enhanced portrait is now ready to be shared with the world, or you can continue editing in Adobe Photoshop.
Editing eyes in Lightroom Mobile can profoundly elevate the quality of your portraits, making them more engaging and expressive. By carefully using the selective edit brush and adjustment sliders, you can achieve bright, colorful, and sharp eyes that elevate your subject’s natural beauty. Practice is vital to mastering these techniques, enabling you to enhance your portraits quickly and confidently.
